XML Titler with Carbon Subtitle Workflow
Supported Version
FTC 4.4.0 or above
Introduction
FTC supports various subtitling workflows via filters and plugins, including:
- Subtitle Burn-In Filter: Adobe Encore, Vistitle, Cavena (.890), OP47 Teletext.
- EZTitle Plugin: Supports multiple formats, including EBU, TimedText, etc.
- XML Titler: Supports Capella-defined XML format and Carbon Subtitle XML format.
This guide focuses on XML Titler with Carbon Subtitle XML.
Carbon Subtitle XML Descriptions
Carbon subtitle xml is a proprietary subtitle format, but was widely used particularly in the asia market. While FTC does not support all attributes and features of it, most of them are supported to enable Carbon subtitle workflow with minimal modifications from customers.
We start by describing the subtitle XML format with this example:
Example:
<TitlerData>
    <data StartTimecode="00:00:51;28" EndTimecode="00:00:55;26" Title="This is a sample" />
</TitlerData>
This means "This is a sample" will appear from 00:00:51;28 until 00:00:55;26.
Alternative: Instead of
StartTimecodeandEndTimecode, you can useStartTimeandEndTimewith floating-point values in seconds.
Global Settings
The first “data” XML child contains global settings that apply to all subtitles:
- Font: Any system font is supported, including non-English fonts and EUDC.
- CharSize:
0.0to1.0(relative to source resolution). - ColorR, ColorG, ColorB: Text color (RGB, range 0-255).
- Transparency:
0.0(opaque) to1.0(fully transparent). - HardShadow:
0(off) or1(on, adds a hard border). - ShadowSize:
0.0to1.0(border thickness). - PosX, PosY:
0.0to1.0(relative X/Y position). - HAlign:
0= Center,1= Left,2= Right (default: Left). - VAlign:
1= Center,2= Top,3= Bottom (default: Top).
For alignment, the first subtitle line is centered at the PosX and PosY location after applying HAlign and VAlign.
Unsupported XML settings will be ignored.
How to Use FTC to Burn Subtitles
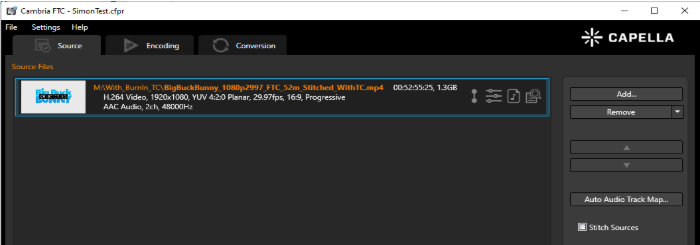
Step 1: Import Your Video Source
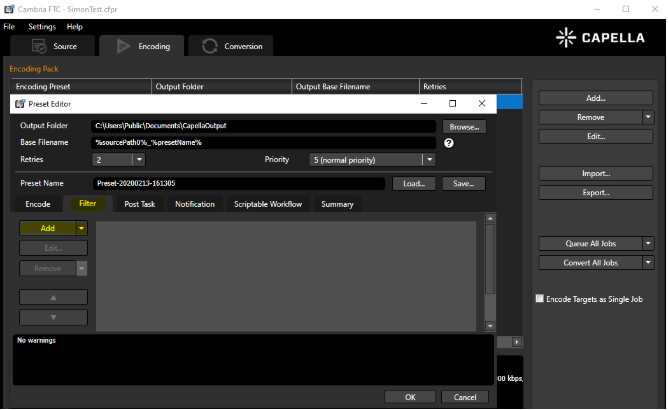
Step 2: Configure Encoding Preset
-
Go to the Encoding Tab → Add a New Encoding Preset.
-
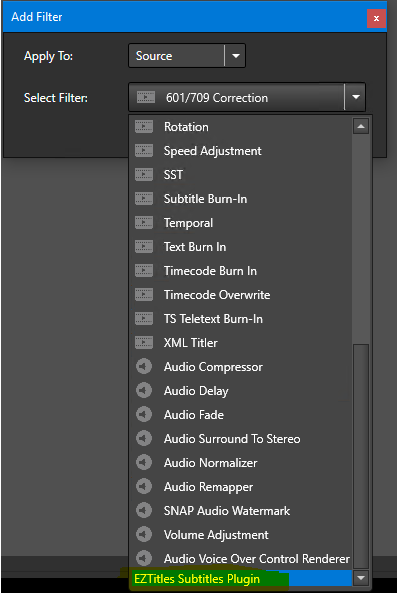
Go to the Filter Tab → Add Source Filters.
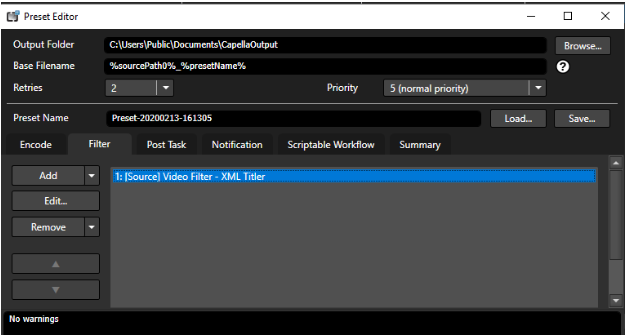
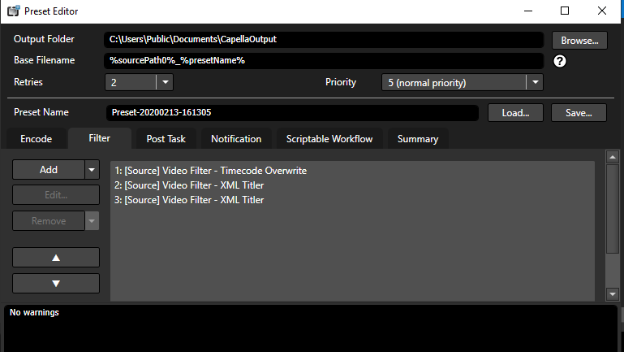
Step 3: Add XML Titler
-
Add XML Titler and Apply to Source.

-
Select the Subtitle XML File → Click OK.
-
You should now see the subtitle preview.
Step 4: Timecode Correction (If Needed)
If your source does not have a valid timecode, you must overwrite it using the Timecode Filter.
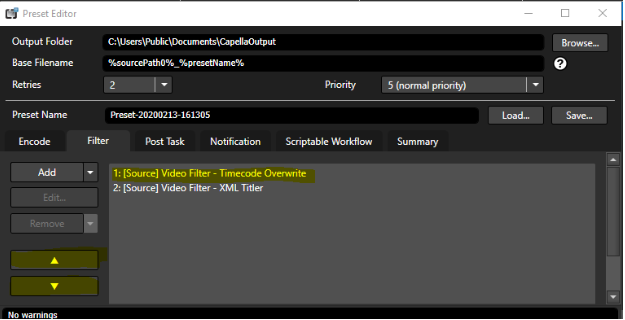
-
Ensure the Timecode Filter is positioned at the top of the filter list.
-
XML Titler requires valid timecode to work.
Step 6: Configure Encoding Settings & Transcode
- Adjust encoding settings.
- Start transcoding.
Remarks & Best Practices
1. OS & Language Differences Affect Subtitle Appearance
- Even with the same font, different OS versions may render subtitles differently.
2. Apply to Source vs. Apply to Target
- Apply to Source: Use when source and target frame rates are different.
- Apply to Target: Use when source and target resolutions differ for sharper text after scaling.
3. EZTitles Plugin Not Found?
- If EZTitles Subtitle Plugin is missing, ensure it is purchased and installed.
4. Using Watch Folder for Subtitle Workflow
- Watch Folder supports dynamic subtitle XML binding.
- Contact Capella Support for advanced subtitle automation.
This concludes the Carbon Subtitle XML Workflow Guide.